Intercooler Buyer's Guide
Buying an intercooler for your car can sometimes be a daunting and confusing task. At maxpeedingrods.com, it is our mission to make that task as an easy and painless as possible. This Buyer's Guide is designed to answer any questions you may have during your search for the right intercooler for your car, and how to buy an intercooler on our website.
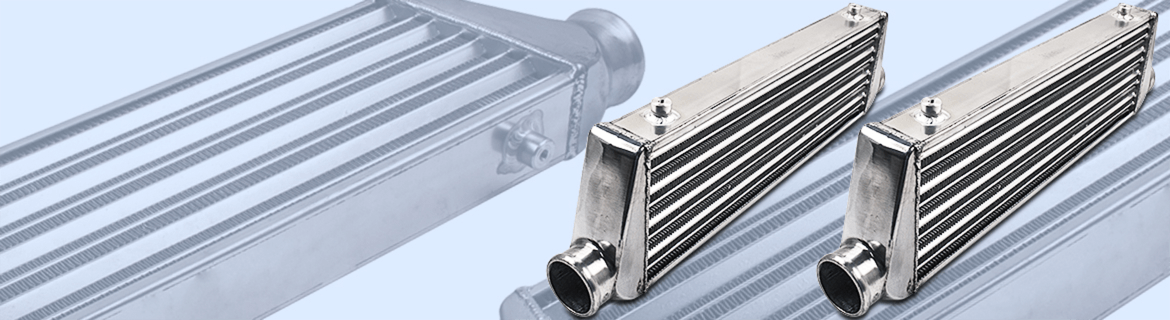
What is an intercooler?
The question could arise that why not the turbochargers get overheated despite running in extreme temperatures and taking huge loads of pressure. The answer is – an intercooler. An intercooler is an intake air cooling device used commonly on turbocharged and supercharged engines. Intercooler cools the air compressed by the turbo/supercharger reducing the temperature and increasing the density of the air supplied to the engine.
How does an intercooler work?
As the air is compressed by a turbo/supercharger it gets very hot, very quickly. As its temperature
climbs its oxygen content (density) drops, so by cooling the air, an intercooler provides a denser, more
oxygen rich air to the engine thus improving the combustion by allowing more fuel to be burned. It also
increases reliability as it provides a more consistent temperature of intake air to the engine which
allows the air fuel ratio of the engine to remain at a safe level.
There are two types of intercoolers: Air-to-Air and Air-to-Water
As the air is compressed by a turbo/supercharger it gets very hot, very quickly. As its temperature
climbs its oxygen content (density) drops, so by cooling the air, an intercooler provides a denser, more
oxygen rich air to the engine thus improving the combustion by allowing more fuel to be burned. It also
increases reliability as it provides a more consistent temperature of intake air to the engine which
allows the air fuel ratio of the engine to remain at a safe level. There are two types of intercoolers:
How to buy an intercooler?
Selecting an intercooler is never an easy thing unless you get to know these things nicely. You can find your intercooler by entering your vehicle's year, make and model, If for any reason you cannot , you can find it by its Original Equipment Manufacturer (OEM) number. The OEM part number can be found directly on the part itself. You can also call a dealership with your VIN, and they will provide you with the OEM part number. You can contact one of our car specialists at through our website for further assistance on how to buy an intercooler.
Why buy intercooler at MaXpeedingRods?
MaXpeedingRods has been engaged in the research of overseas racing products and culture for
decades.
If you are looking for intercoolers, you have landed at the right place.
On the basis of your vehicle make and model, you can choose from a plethora of automotive
maintenance and accessories. MaXpeedingRods offers a seamless online shopping experience and the
streamlined e-commerce interface makes it easy for you to find just the intercooler you
want.
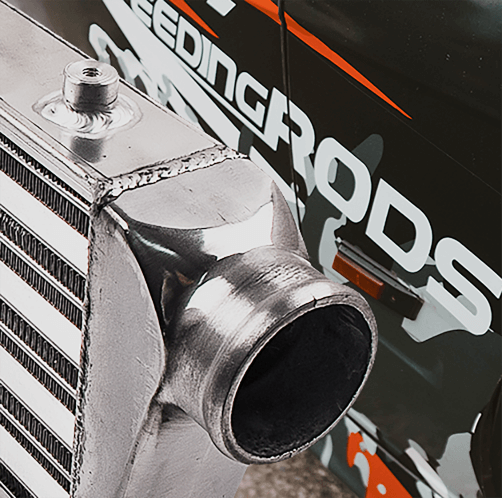
MaXpeedingRods offers a variety of intercoolers with high quality.
• 100% quality assurance tested
• Made out of high quality of 6061 aluminum Manual polishing finished
• Pressure tested to over 55PSI
• Direct Replacement Hi-flow Bar & Plate unit
• Single piece cast unit will not leak like original
• Plateished in T-6061 aluminium alloy
• Accepts all original sensors
What happens when the intercooler is damaged or nonfunctional?
The intercooler sits between the turbo and the intake manifold, and its job is to cool the compressed
and heated air
coming out of the turbo.
Generally, the connecting lines/hoses between the intercooler and the
engine may leak,
causing a drop in the pressure of the compressed air. Any extraneous substances in the air from the
turbo can
also damage the intercooler parts.
If the intercooler springs a leak, then your compressed air from
the turbo
will leak out and, depending upon the size of the leak, it could appear that you have not turbo at all.
If the intercooler is blocked and the compressed air cannot flow through it, the engine will be starved
of oxygen and will stop. If the intercooler fails because the cooling air cannot flow across its heat
exchanger fins, then it's like there is no intercooler and the heated, compressed air shows up at
the intake manifold all heated, but still compressed; the engine will run, but will not make as much
power because the air charge will not be as dense.

How to install an intercooler in a car?
While replacing a damaged intercooler, it is always a wise decision to replace the associated parts including the inlet hose and outlet hose, as well. This installation guide is only meant as an outline and is not intended to teach a novice how to do the job. If you are unsure of your ability stop and take your car to a professional.
Using the manufacturers specifications raise the front end of the vehicle and position on jack stands. Don't work on a car not properly supported.
Step 2: Remove the front bumper.
Start by removing the front grill. The first screws to remove are on the top of the grill, there are
two more holding
it in right that are accessed through the center honeycomb in the lower section of the bumper. Use a
T20 torx to remove
these screws. Once removed lift the grill up and off the bumper.
Next remove the lower dust
shield.
You will need to get underneath the car for this. There are 12 T25 torx and 4 T20 torx screws
holding the shield in.
Once all 16 are removed you will be able to slide the shield out.
Next move onto the wheel
liners.
There are three horizontally positioned T25 torx screws holding the bumper to each wheel liner. Each
side also has
one vertically position T25 torx screw.
Next remove the one T25 torx screw on each side
connecting the bumper to
the front fenders and the single T20 torx screws holding the upper portion of the wheel liner to the
front bumper.
The last set of screws to remove is positioned right in the center of the bumper in the area where
the grill originally
covered. These are two T30 torx screws. With all the screws out slide the bumper away from the car.
While taking the
bumper off be prepared to unclip the bulbs for the bumper marker lights (Pull Straight out), the fog
lights(Twist out
fog light counterclockwise), and if your car is equipped with head light washers be prepared to cap
or cover the
exposed hole to prevent fluid from draining out.
Flip the horn over so it's on the top side of the bracket and bolt it back down. The driver's side horn can either be bent upwards or relocated to the top of the bracket like the passenger side.
Step 4: Using the supplied sheet metal screws, bolt the supplied mounting blocks to the core support.Mount in this orientation. Pull the wiring harness down below the mounting blocks.
Step 5: Remove factory air guidance flaps from both sides of the shroud.You can either unclip them or just cut them off.
Step 6: Mount the intercooler core to the mounting blocks (Center the intercooler).Make sure to use blue glue on the screws when installing.
Step 7: Using your flat head screwdriver, remove the rubber intercooler pipe from the passenger side of the car.The side of the intercooler pipe that was attached to the metal (FSI) plastic (TSI) charge pipe off the turbo contains an O-ring that will fit over the supplied intercooler pipe adapter. Swap the O-Ring over and clip the supplied adapter into place.
Step 8: Slide the shorter of the two intercooler pipes into the straight coupler on the intercooler.Leave it loose and slightly angled downward. Next, slide the small end of the 45° silicone pipe onto the discharge pipe adapter installed in step 7. Now slide the intercooler pipe into the large end of the 45° silicone pipe. If this is difficult, you can use glass cleaner as lubricant since it will quickly evaporate and not continue to lubricate the joint.
Step 9: With a flathead screwdriver, remove the rubber intercooler pipe from the intercooler outlet on the drivers side of the vehicle.Then use a 7mm socket and 1/4” drive ratchet to remove the hose clamp that connects to the stock throttle body pipe. If the hose clamp does not loosen and you completely remove the screw, use a screw driver to push up on the reaction block of the hose clamp to loosen it and discard the clamp. Twist the hose off, be mindful of oil that may drip out of the hose since this is one of the lowest points in the system. Clean the oil from the bottom of the stock throttle body pipe.
Step 10: Slide the short end of the remaining intercooler pipe into the intercooler.Then, slide the silicone hump hose over the other end of the intercooler pipe. Slide the opposite end over the stock throttle body pipe. Leave all locations loose for now.
Step 11: Use the 2.5” clamp on the turbo discharge tube.Use the remaining clamps at the remaining locations (45° silicone pipe outlet, IC inlet x2, IC outlet x2, throttle body hump pipe x2). Tighten the 3” clamps with a ratchet and 10 mm deep well socket until the pipes are sealed (be cautious with the stock plastic throttle body pipe). Tighten the 2.5” clamp with a ratchet and an 11mm deep well socket until the pipe is sealed. Be mindful of the orientation of the clamps just in case you have to tighten them later if there is a leak (make them easily accessible).
Step 12: Now leak check the system by spraying the joints with plenty of window cleaner (so it will evaporate and not cause lubrication of the joints after evaporation).Start the car and run checking for bubbles. Rev the engine so that a high amount of airflow will go through the pipe work. Bubbles will show up where there are leaks if there are any. If you unhooked the battery, when you turn the key to the on position, do not start it. Allow the throttle body to align for 30 seconds and then start the car. It will run poorly if this isn't completed before starting the engine. When you are completed, turn the car off and prepare to reinstall the front bumper.
Step 13: Install the air guidance plates between the mesh and the painted plastic.You do not need to remove the honeycomb to install the plates. Slide them into place and they will snap in. Reinstall the front bumper in reverse order of step 2. Connect the fog lights, the sidemarkers, and the headlight washers (if applicable). Slide the bumper on. Start the T30 torx Screws in the center to hold the bumper in place. On each side, attach the bumper to the fender with the T25 torx screws as well as to the wheel liner. Then, install the front wheel liners. There are four T25 torx screws, 3 horizontal and in the vertical orientation. Then install your dust shielding on the bottom. There are 12 T25 torx and 4 T20 torx. Make sure all screws are tightened underneath the vehicle. Slide the grill back into place with the tabs clicked into their sockets. Tighten the four T20 torx screws. Reinstall the batter cover if that was removed.